When working with young piano students, it’s important to teach them *how* to practice from the very first lesson. Positive home routines will set students up for success. If, however, good practice habits are not taught, piano time at home can become an unstructured mess.
To help teach your littlest students how to organize their home piano practice sessions, today we’re sharing a printable that you can use to make “DIY Practice Sliders”!
Practice Sliders are a simple, cute and effective way to help your young piano students learn to work through all parts of their home practice time. Read the How-To Guide below for instructions…
How To Guide
DIY Practice Sliders
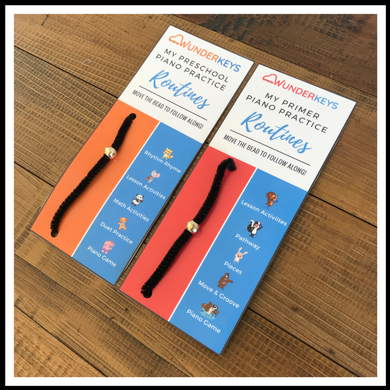
To make your own DIY Practice Slider, you will need our printable, a pipe cleaner and a bead.
To begin, download the printable and select the preschool or primer design depending on your student’s level. Print out the Practice Slider on card stock and then punch a hole through the two marked white circles. Finally, string one bead onto the pipe cleaner and then thread the pipe cleaner through the two holes; twisting it at the back to secure it into place.
To use your new Practice Slider, instruct your student to slide the bead to the top of the Practice Slider and complete the WunderKeys lesson task found to the right of the bead. Once Task 1 is complete, your student then slides the bead one position down and completes the next task. This procedure is repeated until your student reaches the end of the Practice Slider (and thus the end of the practice session).
Voila! An easy, visual way for your piano students to create “wunderful” practice habits.
Have You Heard?
We’ve just released WunderKeys Primer Piano Book Three and are hard at work on Level 1! You can check out all of our WunderKeys books on Amazon.